Hi! Welcome back and thanks for returning!
I am pretty excited about this post because there is a really good chance that we will be talking about the fact that I have built myself what I would consider to be the perfect mountain bike. Or, dare I say….the perfect bicycle (for me at least). Period.
OK! Let’s jump right in!
I actually feel really excited about this new bike. I’m more excited to build up this bike than I thought I would be. I mean, I have an idea why, so it’s no REAL surprise. Let’s dive into a little background on this though, so you can see where I am coming from.
The last bike I felt this excited about building was my Surly ECR. When starting the build for the ECR, I was coming off of a two and a half year stint of riding a fully rigid Surly Karate Monkey that was a really fun bike. Like really, really fun. But at the time, I was reading blogs and following a lot of other cyclists that were ditching the “race” attitude while riding. The subject matter for some of these discussions and articles being stuff I’ve never taken into consideration. Like, supple tire casings, plus sized tires, no lycra, riding in regular clothes, wide rims, comfort and riding more upright, bar sweep, flat pedals…..the list goes on and on, there was even one guy by the name of Grant Petersen that suggested that you could actually get away with owning “one bike for everything”….crazy I know!! Some of these other cyclists I was following were even stopping somewhere cool during their ride, soaking in the sites and making coffee using stuff they had carried in bitchen handmade, waxed canvas bags attached to their bikes….some in baskets! I know, crazy right!? They were swapping traditional parts like saddles, stems and bars for more comfortable options. Their bikes had a more comfy geometry lending to a riding position that was less aggressive and more upright. They were touring on dirt, and doing this new (to me) thing called “bikepacking”. I was really intrigued. Like, REALLY intrigued. I was pulled to this style of riding instantly upon reading more about it…like nothing before. It was SO different than what I was used to doing on my bike rides…and at the same time, I felt it was exactly what I was looking for.
I was sold. I proceeded to run out and swap out my “racey” saddle and straight bar on my Monkey, for a Brooks B17 saddle and a pair of Jones Loop handlebars. And, off we go.

Now, on to the ECR.
It was a new offering from Surly at the time and was a specific bikepacking/dirt touring bike with a very specific geometry. I wanted to try it bad…so, I did. Out with the Monkey frame/fork and in with the ECR frame/fork! The aforementioned excitement about the ECR build was about diving into something completely new and different. The Monkey, although one of the funnest mountain bikes I have ridden, represented the way I have ridden mountain bikes for the last 25-30 years. Until I installed the new saddle and bars…that little change made a HUGE difference. Like making me less fatigued during and after a ride, I felt like I could ride longer, climb more…it was a way bigger difference than I imagined it would be. It really whet my appetite for the real thing. So, I pulled the trigger on the ECR. While the changes I made to the Monkey were more of a “wading knee deep” in the water of something new, the ECR was me “climbing up a tall high dive and diving head first DEEP” in the water of something new. It was a completely different bike build, experience, philosophy and ride. It was really exciting to me at the time!!
That’s how I feel about the Esker Build. Excited for something different. I know I have flip-flopped a lot in the past few years about how I’ve been wanting to ride, but I can’t help it. Sometimes, I like to try new stuff and when that rare time strikes, my personality type drives me to go “all in” it’s just the way it is. If you wanted a refresher of why I am switching back to this type of riding style and from what bike I am coming from riding, as well as a full build list for the new bike, check here.
So let’s get on to the Esker Hayduke build, shall we?
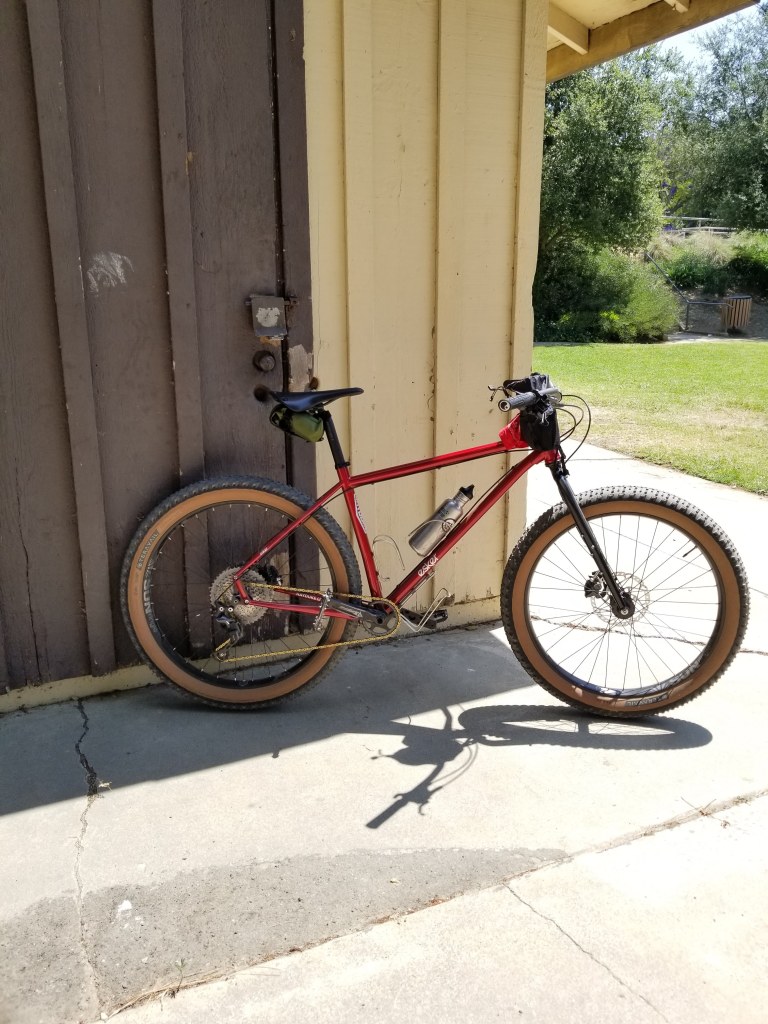
The frame I chose was the Esker Cycles Hayduke in the Ranchera color. The frame is made with a custom drawn externally tapered, seamless, quadruple butted, heat treated 4130 cromoly tubeset that is specific to the frame size. This makes it a lightweight hardtail frame that was beautifully put together. The attention to detail in its construction is awesome.
And if you were curious where the name of the frame came from, check out American author Edward Abbey. His best-known works are his two novels, Monkey Wrench Gang and Hayduke Lives! These two novels are about his fictional character George Washington Hayduke, an American environmentalist hero who uses sabotage to protest environmentally damaging activities in the Southwest. The decals and branding were perfectly understated, just like I like it, with Esker squeezing in a homage to our hero Hayduke, with the title of the second novel on the inside of the chainstays. and two monkey wrenches, one on the top tube behind the head tube and one at the top/back of the seat tube. Yeah, I know, pretty badass.


I chose this frame because the Hayduke had a nice “middle ground” geometry that I thought would handle the comfort/bikepacking I was looking for that the ECR had, and the shredability that the RSD Middle Child had. I opted out for using the front suspension fork from the Middlechild over to the Hayduke, as I really, really, wanted to go back to riding a fully rigid bicycle. I was using a fair share of the parts from my Middlechild, so the new bike will be a 27.5″ wheeled bike. The parts being utilized from the Middlechild are the wheels, drive train, and brakes. That was a good portion of the expensive parts….everything else got sold to fund this project. With that money, and the Covid 19 stimulus dough, I built a great bike with, what I think is a stellar parts list!

Shortly after the frame arrived, the parts just started trickling in.
Since I was moving back to riding in just normal, everyday shorts without a chamois, that meant that I would need a comfy saddle. I wanted to use the Brooks B17 model again. I loved the saddle from using it on the Monkey and the ECR, but it needed a good amount of consistent maintenance. Plus it had a long “break in” period before it was really comfortable. So, I opted for the completely weatherproof, maintenance-free, Brooks C17. Part of their Cambium line. It is a vulcanised natural rubber compound with a nylon cover that claims zero break in period. And so far, after about 7-10 rides, the hype is true, it IS super comfy right outta the box!

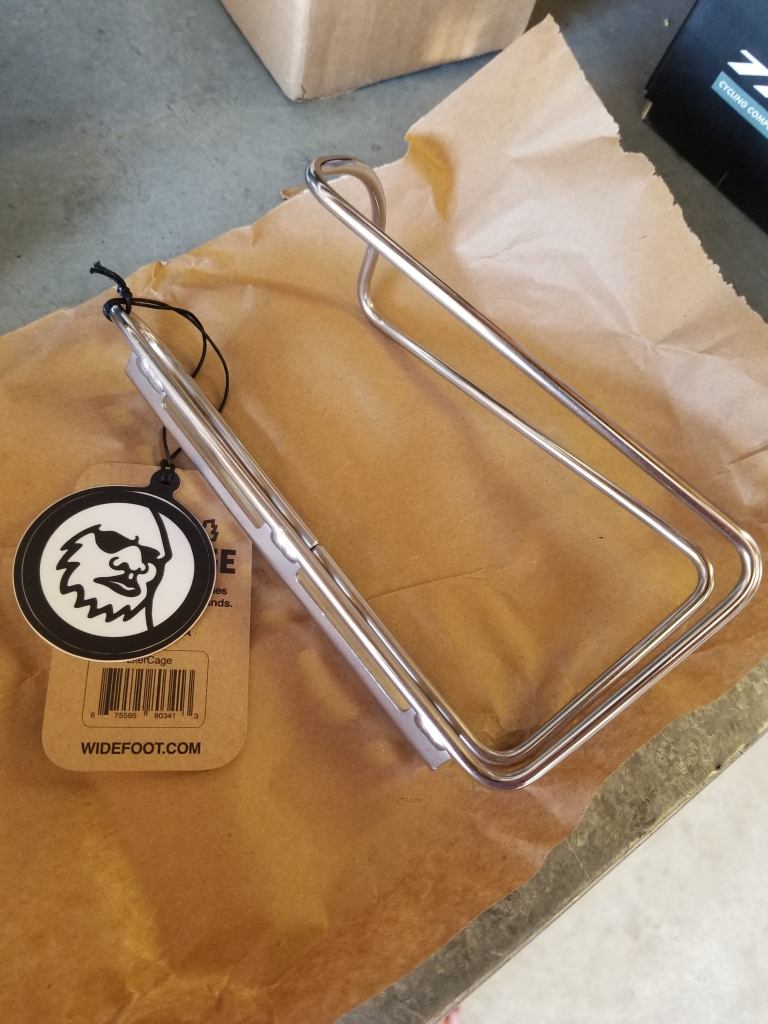
After the saddle got here, I received the cage I ordered for the braze-ons under the down tube of the Hayduke. I chose to use the same cage that I used for the ECR’s under-the-down-tube spot. It’s the Liter Cage from Widefoot. This cage is stainless steel and doesn’t marr up your bottles. It holds the 40 ounce Klean Kanteen bottle perfectly, and that’s what I like to use in that spot! With a full 40 ounce bottle in that spot, it does tend to get a little bit of a slap against itself while riding bumpy trails, but remedied with a Voile strap around the neck of the bottle and the down tube of the frame. Perfect!
The bottle I would normally use in the Liter Cage would be the Klean Kanteen 40oz in the standard, raw stainless color. But, I found one in olive. I chose the one in olive because….well, it’s in olive, duh!

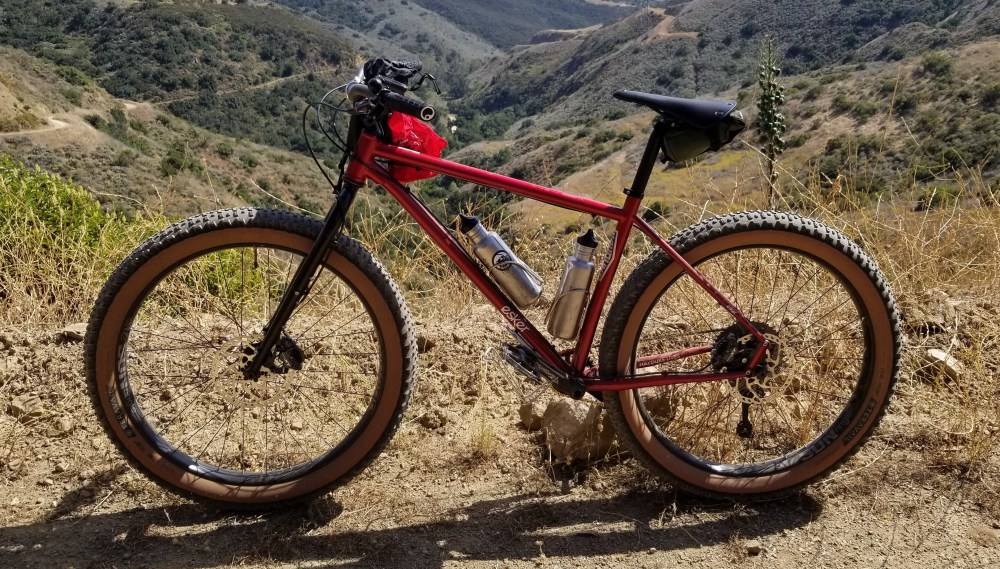
The other cages I use, exclusively, are hand made, stainless steel beauties by Ron at King Cage (he makes a lot of really bitchen’ stuff, so check ’em out). The cage that I use is called the Iris and it’s perfect. They have all of the qualities that I love from a stainless cage. While (obviously) being able to hold all of the standard plastic water bottles, they are actually perfect for holding the classic Klean Kanteen 27oz bottles, which I will mostly be using with this bike. So, yeah. They’re awesome. Ok, coolio.

I love waiting for parts in the mail…so, on we go! At this point in the process, I pre-ordered my handlebars, as they were in the process of making them and were out of stock at the time. **Hint** I will not be using the Jones Loop bar that I used on the ECR. Those were super great and so, so comfy….but remember, I want this bike to be a mix of comfort/non-aggressive and shreddy…..so, more on the bars I decided to use later.
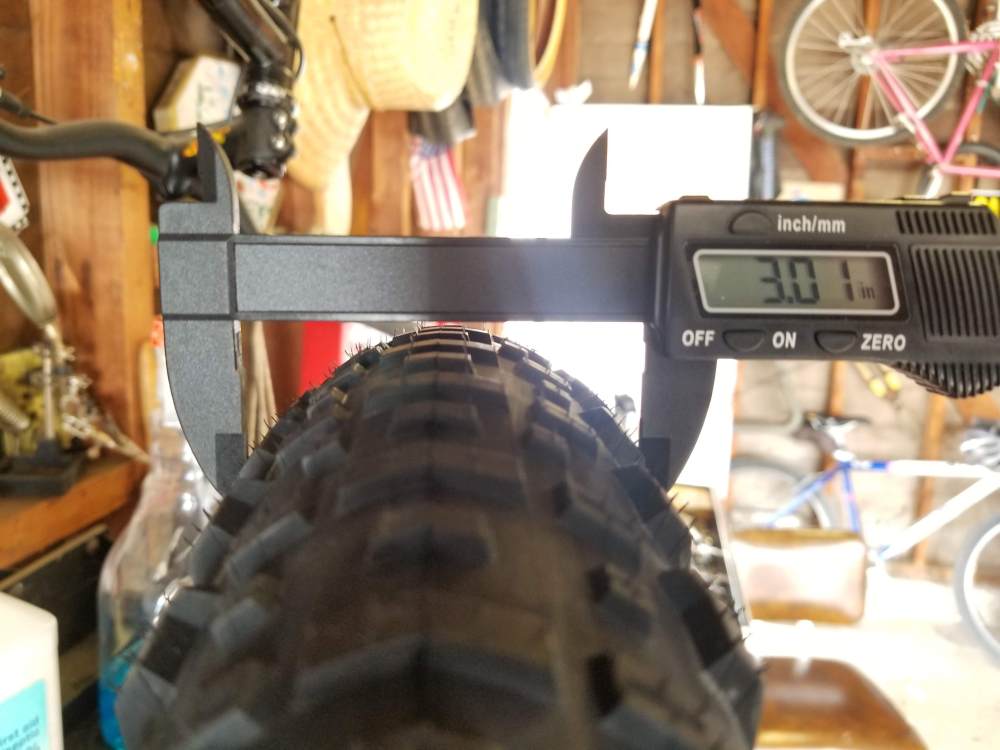
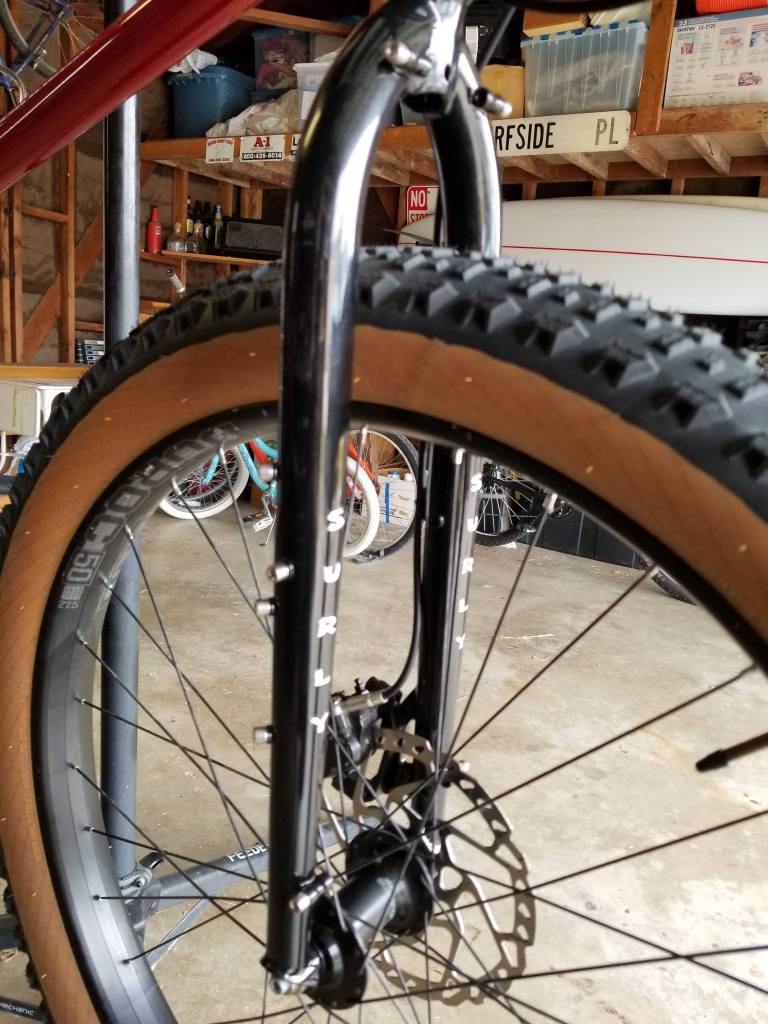
Next up were the tires. I thought (and correctly so) that skin walls would look amazing with the beautiful red finish of the frame. I wanted to go with the same width tires as the on the ECR, which was a 29×3.0 size WTB Ranger. I liked the Ranger a lot. But, I couldn’t find it in a skinwall AND the 27.5 x 3.0 size….it was either or. It’s OK, I wanted to try something different anyway. Then along came (what may be) the perfect tire for this build. The Teravail Coronado 27.5 x 3.0! It’s good in all conditions but really excels in dry, sandy conditions….and that’s what I ride mostly. The reviews were all stellar, and it comes in 27.5×3.0 with a light and supple skinwall casing. It weighs in at 974 grams, which I think is pretty respectable for a 3″ wide tire. It looks amazing. The 3″ width looks extra round and fat on the 27.5 x 50mm wide Sunringle Duraroc 50 rims. These tires roll really, really fast for the size. Hell, they roll fast for any size tire…I’m super impressed with them so far!


On to the fork. I was going to go with a carbon fork on this build. I actually ordered and received one. Then, tragedy struck in the way of a costly, major, rookie mistake, where I cut the steerer tube too short….like “not salvageable” too short. Yeah, I know. So, after beating myself up for about 3 solid days, I opted to pull the trigger on a good ol’ reliable, practically indestructible, Surly steel fork. Ahhhh, Surly. I needed the new fork to fit my existing front wheel, so it needed to accomodate a 15mm thru-axle and have 110 boost spacing as well. I needed as many accessory mounts as possible, because…well, #ridebikesbringstuff….that’s why. So, the Surly Krampus fork fit the bill to a tee for this build. And, I’ll be honest…after a few rides under my belt on this new bike, with my weight, and some of the areas I ride…I do like the confidence that riding a steel fork gives me.

I built the rest of the bike up using a new WCS Ritchey seat post, a borrowed “no-name” 70mm stem. I borrowed this stem in lue of paying one because I wasn’t sure where the bars would end up, but more on that later.

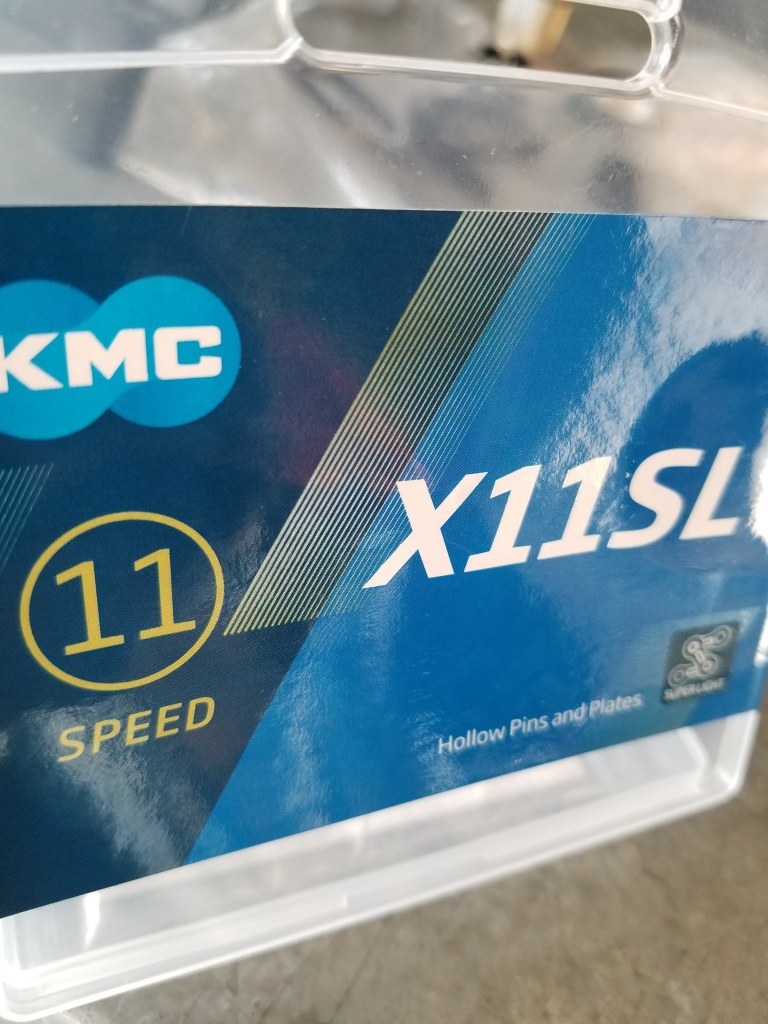
The wheels, brakes, rotors and drivetrain from the Middlechild. I decided to get a new chain, so I opted for the KMC X11SL. It is an amazing chain that I have used on other builds. It’s super lightweight (SL) and works perfectly with my Shimano M8000 XT drivetrain. And it’s gold….so much bike bling in one little package.
Everything was assembled and looking really good! I was getting really excited. I was just waiting on my new bars.

Remember I was looking to bridge the gap between the Surly ECR (comfy, dedicated bikepacking bike) and the RSD Middlechild (agro, shreddy, enduro hardtail bike) I had a pair of Jones Loop Handlebars on the Surly ECR. I loved these bars a lot! They were super comfortable and the geometry of the ECR really complimented them, they were 710mm wide and had a 45 degree back sweep…a match made in heaven on the ECR. The bars that I used on the Middlechild, were a pair of Race Face Turbine R 35’s. These were the bars that came on the Middlechild and were 770mm wide and a solid spec choice on RSD’s part. I had zero complaints about anything spec’d on that bicycle.

I have a bikepacking friend of mine, Chris Stevenson, who has done some serious bike packing. We hadn’t ridden together yet, but we always say we are going to, but life gets in the way sometimes. Ya know? I am convinced that we will soon. Anywho, he had posted about a trip he just did, in the high desert, so I thought I would call him to twist his ear on the bars he was using. I knew he was using Jones Loop Bars (on his ECR) when he rode across the United States…yeah, he did that! Started the trip by dipping his front wheel in the Pacific Ocean upon leaving Huntington Beach, California and fishing the trip with his wife waiting for him and shooting video of him dipping his front wheel in the Atlantic Ocean upon arriving in Florida. It was truly inspiring.
So, I thought he might have some parts that I could buy from him to slap on my build. While talking with him, and geeking out on parts, he told me about his new bars. He hadn’t installed them yet, so he couldn’t tell me how they felt. But he was convinced that he was going to love them. They were called Persuader Bars, made by Daniel at Tumbleweed Bikes out of Idaho. They sounded perfect. I went to the Tumbleweed website and took a look. They were reasonably priced for a pair of bars from a small, “cottage industry” type company, at $135. I got really excited when reading the specs. The Persuader Bars were 810mm wide, with a 35 degree sweep, a 50mm rise and a 31.8 clamp diameter. But…..they were butted chromoly. Yeah, steel baby! Then I noticed they were sold out. BOO!!! But, they had an arrival date of early June, it was May 13th when I started this build, so that wasn’t a long wait. So I pre-ordered them. They seemed to be a perfect combination (in my mind) of the two bars from the ECR and Middlechild….and I was super excited about this. What a find! I texted Chris and thanked him for the recommendation, and started obsessing on this build. Reminder: Don’t overlook the smaller companies. They think out of the box. And unlike the big brands, they have the opportunity to offer small batches of extremely niche products that may fit your EXCACT needs.

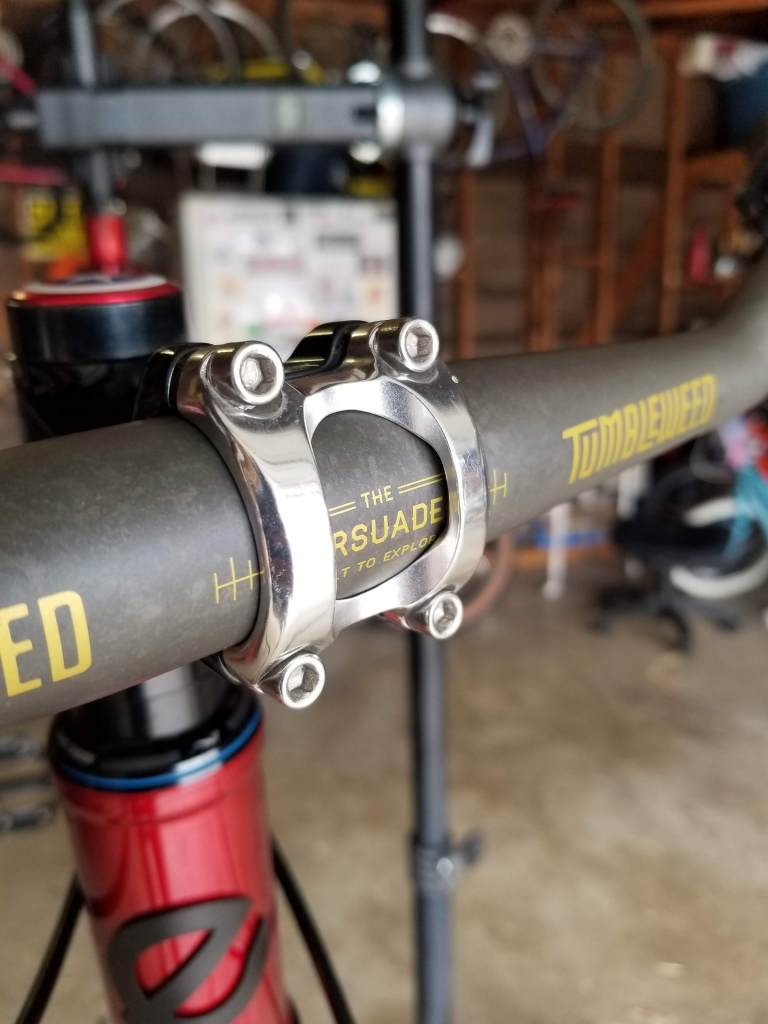
These bars come in two finishes, black and raw. After some hemming and hawing I decided to go with the raw finish. Man, these bars are beautiful in the raw finish. The finish is where the bar was basically clear coated over the unfinished “raw” state of the bars.
The bars kinda became the center point of the build for me. Mostly because I had never seen them before Chris told me about them, and I pulled the trigger on them before actually reading any reviews. I was nervously excited about them.
So, I started to assemble the cockpit of the Hayduke. I got the bars in the stem. The stem, at this point looks to be the right length at 70mm, so in time I will return it to my buddy Dave and buy the Paul Boxcar stem. OK, so I slid the Ergon GE1 EVO lock on grips, attached my Shimano M8000 brake levers and shifter and assembled my Spurcycle Original Bell. The amount (a shit-ton) of real estate on this bar was one of the selling points for me, among many others. So, naturally I was going to put the Wahoo Fitness Elemnt Bolt on the bar, but after thinking about the bag I’m going to hang on the bar (the Roadrunner Bags Jumbo Jammer) I decided to keep it on the stem. So, I decided to go with the K-edge Wahoo Gravity Cap and it works perfectly, K-Edge just, flat out makes a quality, blingy, badass piece of kit. So that was it, I topped off the cockpit build with the essential Revelate Mountain Feed Bag to the right of the stem…..it’s a naked cockpit, in my opinion, without some sort of bag in this spot of a cockpit. All I needed to do was put the Roadrunner Bags Drafter Saddle Bag, that my boys got me for my birthday, on the Ritchey post, put my tools in it and we were set!


That was that. The build for my Eskar Hayduke was complete. Now to ride it and dial in seat height, seat angle, bar angle and stack. That went well and was pretty easy, happening in about three rides. Part of the reason it was so easy was that I was really conscious of geometry on the new frame/fork upon ordering it/them, and how it related to this new bar’s rise and sweep, and how that would affect the amount of reach while in the saddle.

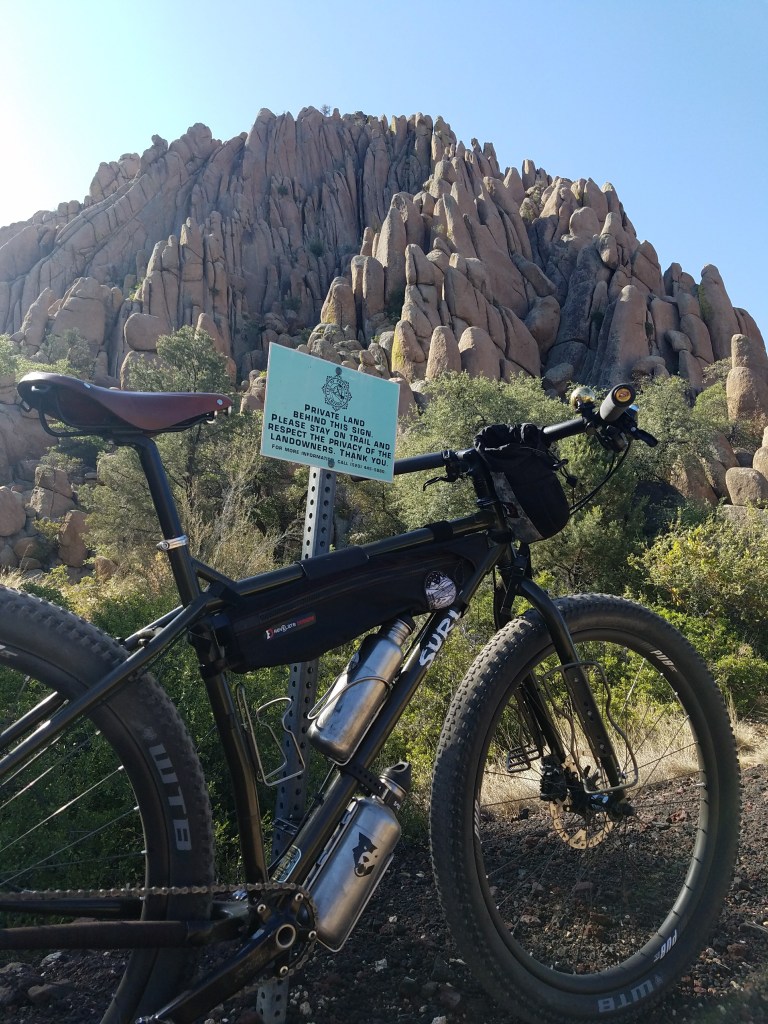
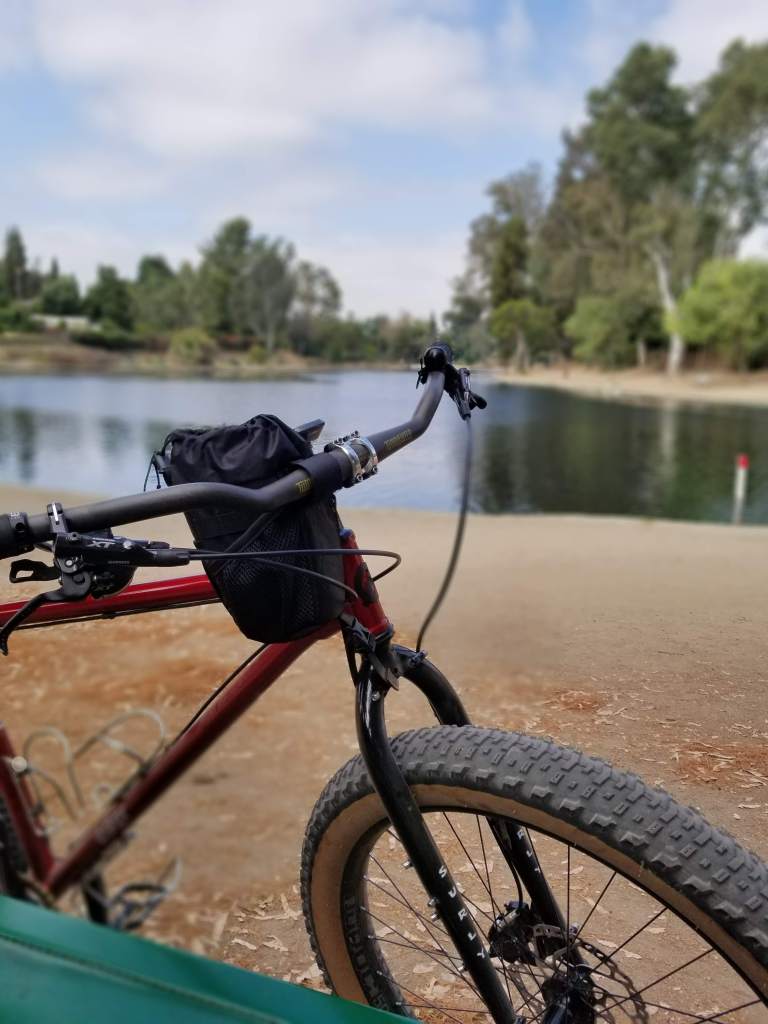
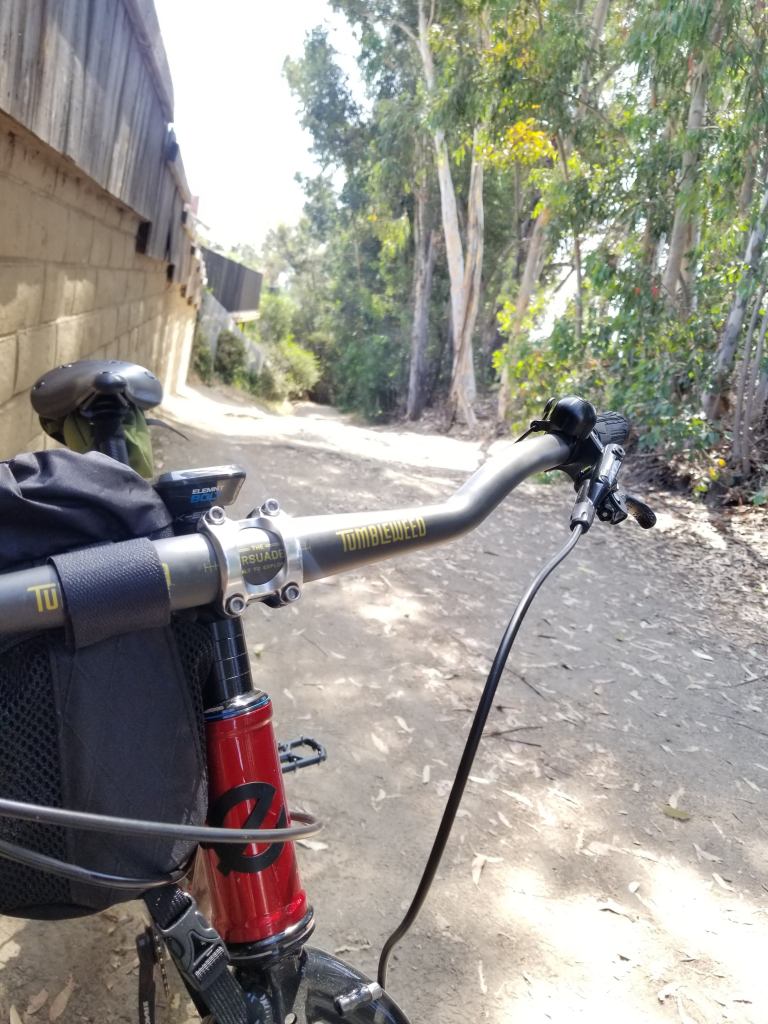
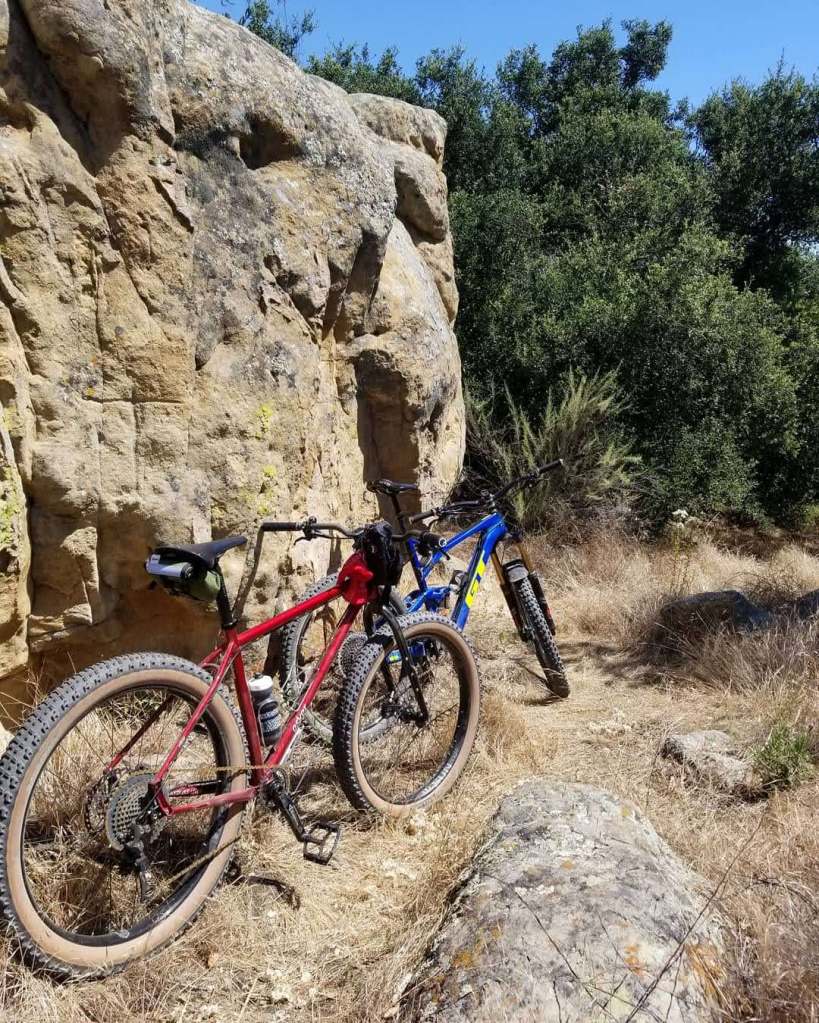
Below are a few pictures of my first several rides on the Hayduke. Enjoy!


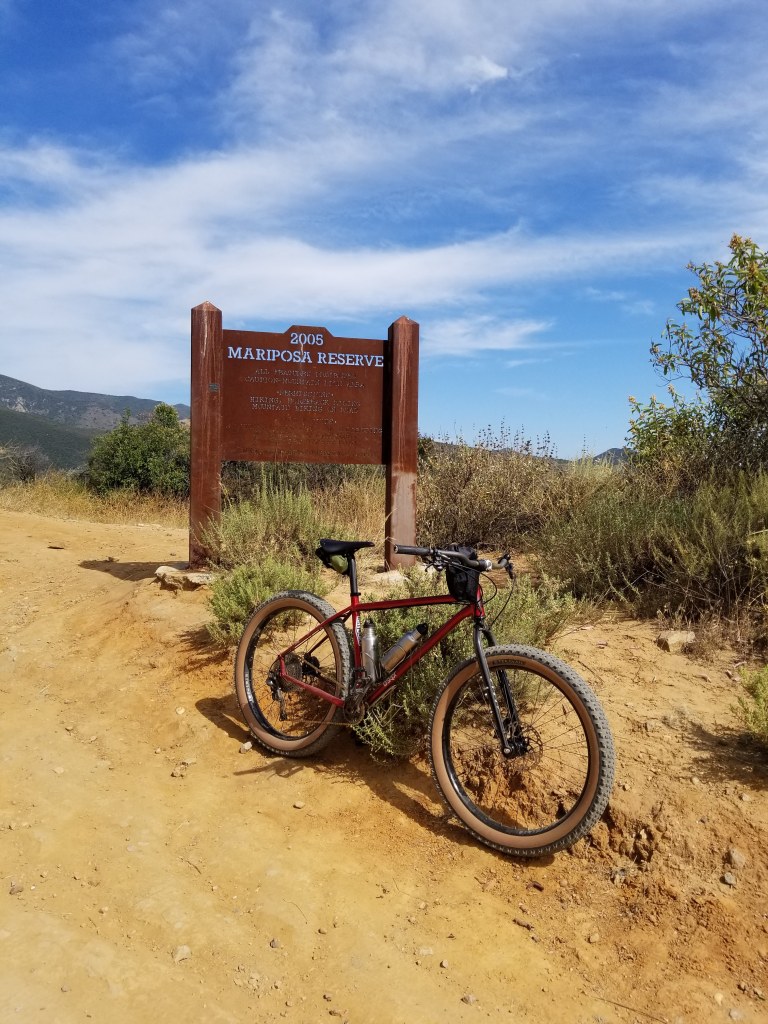

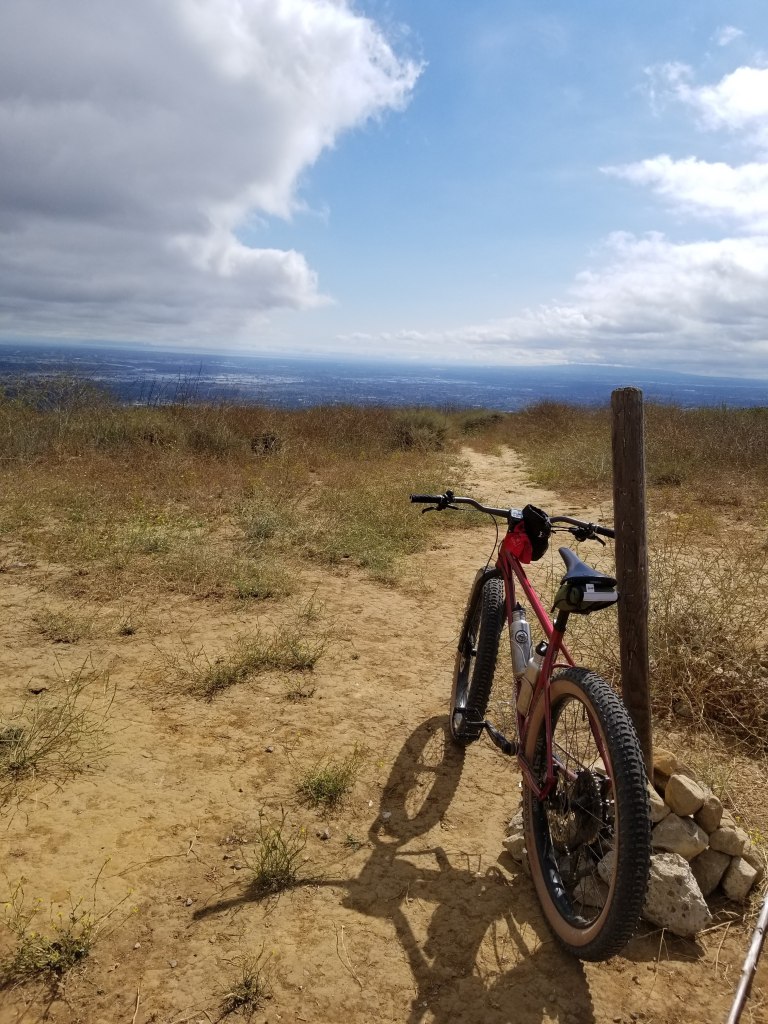

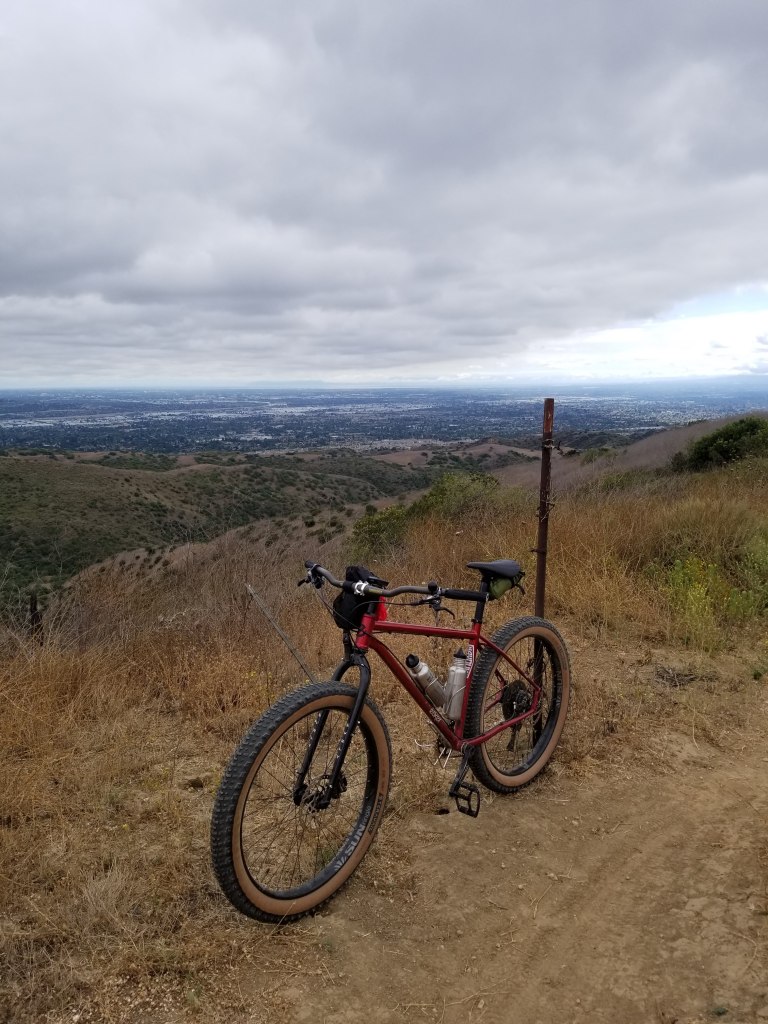
Well, after about 10 rides, this bicycle is EXACTLY what I needed to be. I really hit it outta the park on this one. It is the perfect blend of my last two bikes. The Persuader Bars are very, very comfortable…like all day in the saddle comfy. The bike rolls fast. The geometry of the frame is perfect, it is very stable while descending and climbs super easy and lends to being compliant like steel is. Perfect, I say. It rides very, very, very good. And the parts list I used for the build is perfect for what I need, not the lightest or the best, but still perfect. Perfect, I say!
There is something very comforting to me to build a bike that has absolutely nothing to do with competitive cycling, or keeping up with what everybody else is doing/riding. Or worrying if I will be fast enough. It’s so refreshing, and part of what I’ve been missing in the time after I sold the ECR and bought/rode the Middlechild. A time when I was filled with pre-ride anxiety, had a few nasty falls, couldn’t get my head around how I was riding. Still loved riding, but it carried an unexplainable baggage with it while on the Middlechild. I can’t really explain it. But before I sold it to build the Hayduke, it had been sitting for almost 9 months. I’ve never had a bike sit that long. I just didn’t want to ride it anymore. You get it? Maybe not, and I don’t know how to explain it. Sorry.
I guess, buying it was a mistake, and that’s OK. We live and learn by trial and error sometimes.

So, I will repeat this again; when all else fails, ride what makes you happy. Ride. What. Makes. You. Happy. Buck the norm. Shop the little guy. Try something different, vastly different. Step out of your comfort zone. It’s OK to just ride. If that means riding fast and racing, cool. But, just ride. Ride what makes you smile like a kid. The Hayduke has me riding like a kid again. Seriously.
I couldn’t be happier.
Go ride your bike. See you next time.


Great looking bike. Congrats, Ron! I hope to see it in person soon.
LikeLike
Thanks Jeff!!
LikeLike
Bike porn
LikeLike